
In this post I give away all of my essential acrylic painting tips for beginners. It took me years to learn these things on my own but hopefully I can help you to speed up the learning curve.
The fact that acrylics are virtually odorless and they clean up with regular soap and water makes makes them great for beginners. They also dry fast so you can immediately paint over mistakes.
As a beginner, you will make a lot of mistakes and you should expect a few challenges along the way.
The tips below should help you with these challenges which should make learning how to paint more convenient and enjoyable.
This post contains affiliate links to Amazon and Blick Art Materials which means that if you click on a link (photo or text link) that leads to these sites and make a purchase, I earn a commission at no cost to you.
1 Practice Painting on Paper
You can expect to make a lot of mediocre paintings when you’re just starting out. I know this from experience!
Canvas is expensive to practice on and they take up a lot of space which is why I recommend practicing on paper.
While regular drawing paper will buckle when you paint on it, you can buy acrylic paper that has a special coating on it. This coating is also known as sizing.
The sizing prevents paper from absorbing the moisture from the paint.
Acrylic paper is thicker than drawing paper and it’s available in different textures. Some brands have a canvas like texture while others look more like watercolor paper.
- Strathmore Acrylic Paper has a linen texture that’s similar to canvas
- Montval Acrylic Paper has a cold press watercolor paper texture
The acrylic papers that I recommend above are acid free and should be archival.

Professional artists also use acrylic paper for final paintings so it’s not just for practice.
So when you do make a painting you’re proud of, it should last for years. You can frame acrylic paintings on paper in the same way you would frame a watercolor painting.
Unlike watercolor paper, you don’t have to stretch acrylic paper.
Another option is to use canvas panels which are cheaper and easier to store than regular canvases. Here’s my in-depth guide to canvas panels.
2 Use a Palette That’s Made for Acrylics
The palette that you mix colors on can become a real chore to clean if you select the wrong one.
For example, some painting kits or table top easels come with wood palettes. Those work okay for oil paints because you can scrape them off while they’re still wet.
However, dry acrylic paint will be impossible to clean off a wood palette.
Thankfully, there are palettes that are designed for use with acrylics.
I recommend the Fredi Weber peel-off palette. It’s made from a type of plastic that acrylic paint doesn’t stick to. So if the paint happens to dry on it, you can just peel it off.
Soaking the palette in warm water will help to soften the dry paint and make it easier to clean.
Thinner layers of acrylic paint won’t peel off, but you can easily wash them with a warm wet rag.

Other types of plastics don’t work as well for palettes. For instance, it’s a real chore trying to clean dry acrylic paint from a plexiglass palette.
Another option is to use a Masterson sta-wet palette which will keep your paints wet overnight. I use it to keep paint wet for up to a week. I wrote more about how it works in my post about the best acrylic palettes.
3 Use a Limited Color Palette
The word palette refers to the surface that you mix colors on, but it can also mean the selection of colors that you use.
A useful color mixing tip is to use a limited palette. A limited palette is a small selection of colors that you can use to mix all of the colors you need.
When you walk into an art supply store it’s easy to become inspired by all of the beautiful color charts. Some lines of acrylics have over 100 available colors.
Having too many colors on your palette makes things too complicated. Many beginners struggle with figuring out what colors to use and having 20 colors on your palette makes it worse.
In my post about the 7 colors you need to start painting with acrylics I recommend the following colors.
- Hansa Yellow Medium
- Cadmium Free Yellow light (or any opaque yellow)
- Pyrrole Red or Cadmium Red Light
- Quinacridone Magenta
- Ultramarine Blue
- Phthalo Blue (green shade)
- Titanium White

These are the colors I use in my color matching demonstrations that I post on social media (Here’s my TikTok account and my YouTube channel). It’s possible to use even fewer colors but I feel this is a good compromise.
In case you’re wondering, you can mix your own black paint. I normally don’t have it on my palette but I do use it occasionally.
4 Select the Right Type of Acrylics for Your Style
The acrylics that you find in craft stores are usually the heavy body acrylics which have a thick consistency.
You can use them to build up textures and they retain the bristle marks from your paint brush.
This is great if you want to mimic the look of oils but it can work against you if you want to mimic the look of watercolors or gouache.
In case you’re wondering what gouache is, here’s my post about the differences between gouache and acrylics.
Or perhaps you just don’t want to have any bristle marks or texture in your paintings.
Fortunately, acrylics are available in a wide range of consistencies. There are acrylic inks, fluid acrylics, heavy body acrylics and acrylic gouache.
You want to choose the type of acrylic paint that best suits your style. See the list below for a summary of each basic types of acrylic paint that are available.
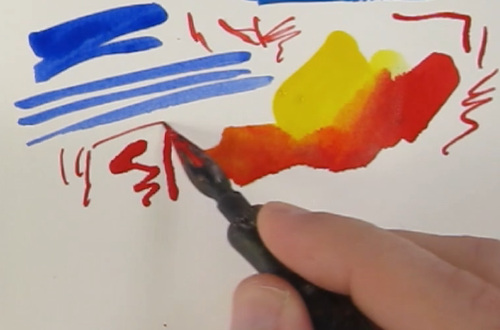
- Acrylic Ink– This is the thinnest acrylic paint that’s available. I use it sometimes for painting with acrylics in a watercolor style. It’s also good for drawing fine lines with a dip pen. I prefer Golden High Flow Acrylics because they seem to be the most water resistant when you use them on canvas.
- Soft Body Acrylics – these acrylics have a consistency that’s similar to heavy cream. This paint is good for creating paintings with minimal brush texture. You can also dilute it with water for watercolor effects. In my opinion, Liquitex Soft Body acrylics are slightly thicker than Golden Fluid Acrylics.
- Heavy Body Acrylics– these are the most common types of acrylics. They have a thick consistency that’s similar to oil paints. There are many brands available: Golden and Liquitex are popular.
- Slow Drying Acrylics- Golden OPEN acrylics contain retarder which make the paint dry slower so you can have more time for blending. You can also add acrylic retarder to any brand of acrylic paint.
- Acrylic Gouache – is basically matte acrylic paint that’s formulated to look like traditional gouache. It dries with a matte finish and doesn’t leave a lot of brush textures. Liquitex acrylic gouache has about the same consistency as their soft body line. Holbein Acryla gouache seems a little thicker and is available in tubes.
5 Sketch Before You Paint
It’s much easier to fix a mistake in the drawing stage than it is in the painting stage.
Try sketching out the major shapes before you begin painting. There’s nothing worse than being nearly done with a painting and when you notice a major mistake in the drawing.
Part of painting representationally is being able to accurately record the size, and position of the subject. The time to notice and fix these problems is in the drawing stage.
I can’t emphasize this point enough–it’s extremely laborious to fix drawing errors in the painting stage.

I usually make some sort of sketch before I begin a painting. It may seem like drawing on the canvas (or paper) may be an additional step, but it can actually save time.
You can also sketch with a paintbrush directly on the canvas. Burnt Sienna or Burnt Umber are good colors to sketch with.
Tips for Sketching on Canvas
Soft graphite pencils, such as a 6B pencil can smear when you paint over the lines.
The hardness of a pencil is indicated on the side of the pencil. Harder pencils don’t smear as much. Here’s a link to the drawing pencils from Blick.

When I want light lines that don’t smear I use 2H or a 4H pencil for drawing on canvas.
Hard pencils produce lighter lines and the harder point can also feel somewhat “scratchy” on the surface of the canvas. The lines are also difficult to erase.
Whether these characteristics are advantages or disadvantages depends upon what you’re trying to accomplish.
For example, these are all benefits when I’m using acrylics in thin diluted manner similar to watercolors. The lighter lines are less distracting and they don’t smear as I paint over them.
Watercolor pencils are an alternative to graphite pencils if you want to be able to erase your drawing.
Sometimes I sketch with a watercolor pencil on canvas because you can erase it by wiping it with a wet rag.
As a beginner, it can be liberating to know that you can completely erase your drawing if you’re not happy with it. I use gray watercolor pencils for sketching on white canvas. White watercolor pencils work well on darker canvases.
The lines will dissolve as you paint over them so you may want to avoid drawing with dark or vibrant watercolor pencils.
For more information, you’ll want to read my in-depth guide to sketching on canvas.
6 Tone the Canvas With Color
Instead of starting out with a white canvas you can tone it with a color. Toning the canvas with a color has a couple of benefits.
The first one is that it makes it easier to judge the value of a color. This is because the stark white of the canvas can make colors appear darker than what they really are.
Gray is popular for toning canvases because it’s neutral and it’s not too dark or too light.
The other benefit is that if you leave gaps between the shapes in your painting you’ll have a color showing through instead of the stark white canvas.

That’s one of the reasons why I like to tone the canvas with Burnt Sienna. It leaves a little bit of a warm color showing through in those areas.
Two Ways to Tone a Canvas
The first way to tone a canvas is to add color to acrylic gesso before you apply to the canvas. If you prefer to paint on a flat gray background you can add a small amount of black acrylic paint to the gesso.
A second option is to dilute some acrylic paint with water and quickly brush it onto the canvas. This will leave streaks but I believe that adds interest.
I like to use Burnt Sienna for this purpose. You can see me apply Burnt Sienna to the gessobord in my YouTube video at the top of the post.
Another benefit of toning the canvas is that any gaps between the shapes will show up as a warm brown color instead of white.
7 Learn How to Control the Drying Times of Acrylics
Acrylic paint dries very quickly, and many beginners complain that it dries before they can finish blending.
Sometimes that’s an advantage for beginners because you can paint over your mistakes without having to wait for the paint to dry.
You can sometimes use that to your advantage, such as putting down numerous layers in a short amount of time. For example, you can apply numerous glazes to a painting in one session.
But when it comes to blending, regular acrylic dry way too quickly. There are some workarounds that you can use to compensate for this.
Use Retarder to Make Acrylic Paint Dry Slower
Adding acrylic retarder to your paints will make them dry at a much slower rate. You’ll be able to blend colors together without having to worry about them drying before your finished blending.
Another option is to use Golden OPEN acrylics which already have retarder mixed into them.
There are benefits to both approaches. If you use regular acrylics and add retarder to them, you have the option of using them as fast acrylics when necessary, or you can add the retarder to make them dry slower.
The advantage of using Golden OPEN acrylics is you don’t have to don’t have to think about how much retarder to add to the paint. It saves time and prevents you from adding too much.
It took me awhile to get used to painting with slow drying acrylics. For instance, I had to train myself to not rest my hand on the canvas because the paint stays wet for that long.
To summarize, if you want to achieve smooth blending with acrylics you should use retarder or use slow drying acrylics like golden open acrylics. Otherwise you’ll be fighting the fast drying nature of acrylic paint.
Use a Hair Dryer to Make Acrylic Paint Dry Faster
As I stated above, you can use the fast drying nature of acrylics to paint quickly. You can apply many layers in a short amount of time.
Once you get used to this you may actually use a hair dryer to make paint dry even faster. I do this just so I can get more layers down in less time.
I also use a hair dryer to make Golden OPEN acrylics dry faster. This way I can take my time with blending and then use a hair dryer to make the paint dry faster when necessary.
This allows me to be able to paint wet over dry without having to wait for the paint to completely dry.
If you’re looking for a middle ground you can mix Golden OPEN acrylics with regular acrylics to make them dry a little faster.
8 Learn the Basics of Color Mixing
Learning how to mix colors can be frustrating. Beginners often struggle with matching colors and it can be challenging even for more experienced painters.
Color theory is an advanced topic that is not as straightforward and logical as you think it should be.
Therefore, I recommend practicing mixing colors as an exercise in itself. This is a way to break down the components of painting and practicing them separately.
This makes it less frustrating because you’re not trying to learn multiple things at once.
I have a number of videos and posts about how to mix colors but my free acrylic color mixing chart is probably most useful for beginners.
My acrylic color mixing chart contains a number of simple mixtures for the most basic colors. All the color mixing recipes only contain two colors to keep it simple.
The chart includes a variety of ways to mix the same colors using different pigments, depending on what you have available in your studio.
I also have many posts about how to mix some of the more troublesome colors and they all include video demonstrations.
If you’re having problems mixing brown, you may want to read my ultimate guide to mixing brown. I explain how to mix light brown, dark brown, and how to mix brown from primary colors.
Mixing the color of the sky can give beginners trouble. In my post about how to mix sky blue, I head outdoors and I match the color of the blue sky overhead and the lighter blue near the horizon.
Purple can be difficult to mix but I give away my recipes for how to mix vibrant purple. In my post on how to mix bright purple I explain the color theory as to why magenta works better than red when mixing purple.
In another post, I explain why yellow turns green when you mix it with black.
Below is my full length color mixing demonstration.
Check out my YouTube playlist on color mixing if you prefer video demonstrations.
9 Experiment With Blending Techniques
There are a variety of blending techniques aside from just brushing the paint back and forth. I recommend experimenting with different acrylic blending techniques and find one that works best for you.
For example, you can use dry brushing to blend colors. Dry brushing is when you wipe most of the paint off the brush and scrub it onto the canvas in circular motions.
In other paintings I use watercolor techniques to create gradients. When you use thinner paint, it tends to flow into other wet areas.
Another possibility is to add retarder to the acrylic paint so that it will keep the paint wet longer. You can use that extra time to get the blending right.
You may want to watch my YouTube videos on How to Blend Acrylics Like Oils and 9 Acrylic Blending Techniques.
10 Keep in Mind That Acrylics Dry Darker
Have you ever noticed that your painting looks darker after it has had a chance to dry?
Well, it’s not your imagination, some acrylic colors have a tendency to dry darker.
The reason for this is the acrylic emulsion has a white and cloudy appearance when it’s wet. This cloudiness lightens the color slightly. However, the emulsion becomes totally clear as it dries.
This is why acrylics dry darker, the cloudiness of the wet emulsion temporarily lightens your colors.
Some colors are affected more than others. It can be so subtle you don’t notice it but you’ll eventually encounter this problem.

The solution is to mix your color to your satisfaction and then add a tiny amount of white to compensate for how it will dry darker.
You can test the color by applying it to scrap of paper and then dry it with a hair dryer. If it matches then you’re done. Otherwise, you’ll have to add more white and dry it and repeat this process until it matches.
I wrote more about this in my post about why acrylic paint dries darker.
Bonus Tip: Use an Easel
If you’re just learning how to paint with acrylics you probably don’t have a dedicated painting studio and an easel.
Many beginners resort to painting at a desk or table.
The problem with this is that it’s not very comfortable. Looking down at your painting for long periods of time puts a lot of strain on your neck muscles.
The solution is to use an easel so that it’s at an angle so you don’t have to look down.
Perhaps you’re putting off purchasing an easel because you think they’re too expensive.

Fortunately, there are affordable easels that work well. I like to use this table top easel that’s built from solid wood (see photo above). It folds flat for storage and it has a drawer underneath for storing some supplies.
Conclusion
Those are my 10 acrylic painting tips for beginners. I hope that these tips will help you to become a better painter amore enthused about painting with acrylics!


