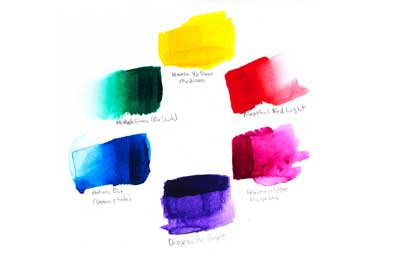
Color mixing is one of those things that looks like it should be easy, but once you try it for yourself you realize there’s a lot to it.
In this post, I cover the top 10 color mixing tips that I have for beginners. Over the past few years, my color mixing videos have gone viral on social media. I receive many questions about how to mix colors.
I can’t reply to every comment that I receive on my videos, but I thought I could put together a blog post the answers most of these questions.
If you’re looking for a condensed version, you can watch my YouTube video below that covers the top 5 tips for beginners.
I hope these tips help you to become a better painter!
Below is my color mixing video course if you’re interested in watching in depth color mixing demonstrations.
Table of Contents
1 It’s Not Practical to Use Formulas for Mixing Colors
People often ask about using formulas with a way of measuring paint in order to be able to mix a color.
It’s not practical to mix color by using formulas or recipes. For one, how would you measure out the proper proportion of each color?
Would you measure it out by weight, volume, or by eye?
You’d have to keep a book with hundreds or even thousands of formulas in it. Every time you need to mix a color you would have to stop painting and look up the formula.
I suppose this idea comes from watching custom paint colors being mixed at the hardware store. The employee finds the formula for the color on a computer and then measures out the pigments, and puts the paint can into a paint can shaker.
This process creates a fairly decent color match. So it’s understandable that you would think you can apply this to mixing colors for a painting.
While it’s possible to mix paints by using recipes, I don’t recommend pursuing this approach to color mixing. It’s much faster to mix colors from an understanding of color theory and it’s also more intuitive.
Below are some of the reasons why I don’t think this is a good long term approach.
In this course I teach the color mixing techniques that I use in my social media color matching videos. It's for beginners and advanced painters. It includes 60 minutes of video.
Measuring Paint by Weight or Volume Is Too Slow for Painting
Measuring quantities of paint by volume or weight is too impractical for an artist.
Think about how this would work. Every time you need a new color, you would have to stop and find a color in a recipe book that’s close to the color you want. Then you’d have to measure out the paint somehow.
You would have to use a scale to measure the paint by weight. In my YouTube video, my postage scale isn’t sensitive enough for this purpose.
To measure by volume you would have to measure the paint using measuring spoons, or a beaker.
When it comes to house paint, the time it takes to measure out the colors doesn’t matter too much. People usually only buy a few colors at a time.
They’re also mixing gallons of paint, so they need to be able to mix a color with the least amount of waste.
But just observe any artist at work. Their color palette has numerous color mixtures on it. Stopping to look up each color mixing recipe in a book takes a lot of time that you could be spending on finishing the painting.
Another limitation to using color formulas is that colors can vary across brands. Not only may the color look different, but the tinting strength may not be the same either.
So a book of color mixing formulas is most useful for the brand that was used to create it.
For example, professional lines of artist paints contain more pigment than student grade paints. The amount of pigment a color contains will affect how well these formulas work.
I discuss tinting strength more in the next section.
So if you watch painters with a lot of experience, they mix color by having an intuitive understanding of color theory. This kind of knowledge and skill may take awhile to master, but it pays off in the long run.
It’s also more versatile. You can change brands of paints, adopt a completely different set of base colors and still be able to mix colors.
2 The Tinting Strength of Each Pigment Varies
Some colors are more potent than others. For instance, a small amount of Phthalo Blue can easily over power a color mixture.
That’s because it has a high tinting strength. Tinting strength is how much of an impact a color has when you add it to a color mixture.
Tinting strength is one of those things that can confuse you when you’re just starting out with mixing colors.
For example, if you look at a color wheel, green is halfway between yellow and blue. So you might assume that you can just measure out equal portions of yellow and blue to create the same green. But if you do that with Phthalo Blue and Hansa Yellow Opaque, you’ll end up with a color that’s a very dark green that’s too blue.
To mix that green that’s halfway between blue and yellow you need to use a large portion of yellow with a tiny amount of Phthalo Blue. That’s because that small amount of Phthalo Blue has enough tinting strength to color the larger volume of yellow paint.
This is something that I demonstrate in the YouTube video at the top of this post.
Some tubes of professional artist paints will list the tinting strength on the label. If it’s not on the tube, it might be on the manufacturers color chart.
If you can’t find the tinting strength for your favorite brand of paint, you’ll discover it on your own just by mixing colors.
3 Test Out Your Color Choices Before Adding It to Your Mixture
Sometimes you have an idea of what color to add to make your color mixture a closer match, but you’re not totally confident that it will work.
The best thing to do here is to test it out with a small portion of your color mixture on the side. That way if you’re wrong, then you can discard that small portion and you still have the bulk of the paint mixture left over so you can try something else.
This is much faster and more efficient than having to start again from scratch.
You can watch me do this in some of my color mixing videos. I’ll add a tiny amount of color on the side of my color sample.
If it has the effect I’m looking for then I’ll add the color to the entire batch.
4 Add a Little Bit of Color at a Time
People often ask me if I make mistakes when I mix colors. Well of course I do! The most common mistake that I make is that I add too much of a color. In fact, I even made a compilation video of all of the times I’ve added too much of a color and I say “that’s too much” (see video below ????).
Adding too much of a color is a fact of life as an artist. Most of the time you can recover by adding more of the other colors to compensate.
The worst is when you add way too much and have to start over. The reason why you would start over is because you would have to add a very large volume of the other colors to correct for it.
That’s why I say it’s better to add a little at a time and creep up on the color you’re trying to match, rather than adding too much.
I don’t start over too often because I follow this principle. And it’s even more effective if you test out your color choices as I describe in the section above.
5 Practice Mixing Paint With a Palette Knife
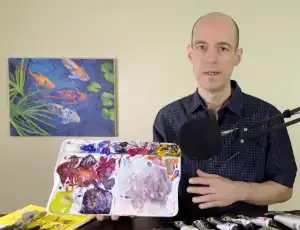
In my color mixing videos, I use a small brush and a very small amount of paint. I do this because it’s the fastest way to mix a color in the short amount of time I have for a video.
However, it’s much more difficult to mix a small portion of paint because every small addition of paint has a large effect on the color. Especially when using the very saturated colors that I keep on my palette.
So I would suggest that you use a palette knife and mix a larger portion of paint so that each tiny addition of color that you add has less of an impact upon your color mixture.
Now, I’m not recommending that you mix huge volumes of paint, but you need more than what I mix with my brush on paper.
Using larger portions of paint will also allow you to test out your color choices on the side. As I mention in a previous section. If you guess wrong, you still have some of your paint mixture left over so you can continue without having to start over.
If you’re afraid of wasting paint then you might want to try using a student grade paint such as Liquitex Basics. They’re a good compromise between quality and price as I write about in my post about the best student acrylics.
Another way to save paint is to mix up your leftover paint and store it in an airtight container. That way you can use it other paintings. I like to mix up my leftover paint which usually makes a brownish gray color, and then use it in other paintings when I need neutral colors.
6 Use a Limited Palette
One way the make your color mixing easier is to use a limited palette. A limited palette is just as it sounds–it’s a color palette made up of just a few colors.
Some brands of paint have over 100 colors. I love looking at these charts and it’s easy to get carried away with buying new colors. However, it’s not very practical to squeeze all of them out onto your palette.
In my videos I use 5 colors in addition to white. There are times when I add other colors when I need them, but for the most part I stick to this basic palette.
I have made hundreds of videos where I match the colors of random objects using just these few colors.
The colors that I use most often are listed below.
- Ultramarine Blue
- Phthalo Blue
- Pyrrole Red
- Hansa Yellow Opaque*
- Quinacridone Magenta
- Titanium White
*Golden is discontinuing Hansa Yellow Opaque and replacing it with Benz yellow. Cadmium Yellow would work too. Cadmium Red is also a good substitute for Pyrrole Red.
A limited palette makes things simpler. If you read some of the comments on my social media accounts, you’ll see that some people like to guess what color I’m going to add next. And they say that they feel like they’re getting the hang of color theory.
One of the reasons they feel like they’re getting the hang of it is because they’re getting familiar with the few colors that I have on my palette and how they interact with each other.
Of course, it takes a lot of practice to get the hang of color mixing. A limited palette will make learning color mixing easier because it reduces the amount of decisions you have to make.
If you have a palette with 25 colors on it, how do you decide which color to add next?
I only have two blues on my palette, and most of the time you can use either one and still get close to the color you want to mix.
Even if you use trial and error, there are still less colors to try.
Another benefit of a limited palette is that you get to know those few colors really well. I know how those five colors work–what the tinting strength is for each color, and whether they’re transparent or not, etc.
It will take much less time to get familiar with 5 colors than it will with 20.
When you use too many colors, the statistics work against you. How many possibly combinations are there when you work with that many colors?
Isn’t It Slower to Mix All of Your Own Colors?
Some of the feedback that I get on my color mixing videos is that I should just start with the color I’m trying to match. For example, if I’m trying to match the color of a brown chestnut, someone will comment that I should “just use brown” instead of mixing it from primary colors.
I think that when you’re first learning how to mix colors, it’s best to mix all of the colors yourself. When you feel like you have a handle on color mixing, then you can think about adding more colors to your palette.
It can look like it’s more work to mix a brown from a palette of limited colors. But brown can be as little as one step away. I usually mix Pyrrole Red and Ultramarine Blue to make brown.
In case you’re wondering, red and blue often make brown instead of purple. I explain what colors I use to mix vibrant purples in my post about how magenta is the secret to mixing vibrant purple.
Another point is that even if you begin with brown, you’ll probably still have to make adjustments to it. How will you know which of those colors you need add if you always rely on buying the colors you need for each painting?
It’s rare that you squeeze a color out of a tube and it’s the exact color that you need for a painting. Mixing colors is a large part of the work involved in being a painter–there’s no way to avoid it.
I’ll add extra colors to my palette when I feel like it will save time or when I need the most saturated version of a color. For example, Cadmium Orange is more saturated than any orange that you can mix yourself.
Watercolor is a medium where it can be an advantage to have more colors available on your palette. Different watercolor pigments produce different effects. For instance, some pigments are granulating which means they leave an interesting pattern or texture as they dry. Other pigments are staining and are very difficult to lift from the paper.
7 A Lot of Color Theory Is Inaccurate or Incomplete
There is some controversy about primary colors in painting. However, this controversy doesn’t exist in the printing industry.
In printing, the primary colors are CMYK which is an acronym for cyan, magenta, yellow, and black.
I worked in the printing industry for over 24 years.
The art books that I was reading at the time stated that red is a primary color so you can’t mix it. Then I’d go into work and see red being produced from printing magenta over yellow.
The fact that you can mix red from magenta and yellow runs counter to almost every art instruction book.
Some art books will say that CMYK color theory only applies to printing and that you can’t use it for painting. However, I’ve demonstrated that you can mix a decent red from magenta and yellow in a number of videos.
The colors that I use in my palette are closest to the printing primaries are Phthalo Blue, Quinacridone Magenta, and Hansa Yellow Opaque.
You can use these colors to make complete paintings. Although I would suggest adding a few other colors when necessary. Especially when you need more opaque colors or even just for the sake of convenience.
But the point is that most color wheels don’t even have magenta on it, or they show it as being a result of mixing red and blue which isn’t true. I demonstrate the muddy colors that red and blue make in my video about why I think color wheels aren’t very guide as a color mixing guide (see below).
One of the common problems with color wheels is they have red as a primary color. As I demonstrate in the video above, red and blue makes brown or a very dull purple. The results don’t line up with what’s printed on the color wheel.
When I use magenta as the primary color I get much better results, it looks close to the CMYK color wheel (as opposed to the red, yellow, and blue color wheel).
You don’t have to use the CMYK primary colors from the printing industry, but just having the understanding about how these colors work together will help you with mixing colors for your painting.
8 Learn How to See Colors Accurately
This tip may sound odd or somewhat condescending. But one thing that you will realize when you get better at mixing colors is that your mind or your eyes are often fooling you.
People assume that apples are red and that grass is a vibrant green. But if you were to sample the colors of these things in Photoshop, you may be surprised at the results.
Apples often have dark brown and burgundy or even dull greens in them.
Grass can be more of a dull green or even a straw color if it’s dry.
One trick, that’s been taught in art school for years, is to use a color isolator.
You can make a color isolator by punching a hole in a piece of white paper. The concept is that you can view a small portion of the color through the hole.
This will help you to separate the color from the object to that you can see it more objectively. I like to think of this as an analog version of the color picker tool from Photoshop.
You can also buy a color isolator that’s more sturdy, there are a few examples below. One has different shades of gray so you can view the color against different values.
Take it with you when you go about your day so that you can practice looking at colors. After awhile, you should start to see colors more accurately. You will find that with enough practice you’ll be able to see the color as it is without having to use the viewer.
Sometimes using one of these in public can look a little weird.
Thankfully, you can also practice isolating colors on your phone. Use a photo editing app on your phone to sample colors from photographs.
It’s something to can do to pass the time that will actually help you with your painting skills.
9 Colors Are Influenced by the Objects Around Them
Another way that color can fool you is that the color of an object can be influenced by its surroundings.
I demonstrate this in my Liquitex acrylic gouache review. In that video, I painted a still life of a white teapot sitting on a wood table (video is below, the teapot section begins at around 1:25).
The color of the wood table influenced the color of the teapot. Your logical mind will think that because the teapot is white, the shadow areas of the pot should be gray. But the bottom part of the tea pot consists of brown and warm grays.
Even without the wood table, most shadows have some color in them. That’s why it doesn’t look natural if you use pure gray or black for the shadow areas in your painting.
One way to get around this problem is to view the color by itself. Or you can sample the color in Photoshop as I describe this in the section above.
There’s another element to this effect which is more subjective. A color can look different based upon what color surrounds it. And it has nothing to do with the color being reflected upon the object.
For example, artists often tone the canvas before they start because it’s difficult to judge colors against a stark white surface. I sometimes tone my canvas with Burnt Sienna for this reason.
A color tends to look darker on a white surface, and it will look lighter against a black surface.
There’s more to this effect, but you just have to be aware of the ways you can be fooled by color, lighting, and the surrounding objects.
10 Learn How to Neutralize Colors
A problem for most beginners is they use colors that are too vivid.
Some professional artists use vivid colors like this as a stylistic choice, and that’s totally valid. However, if you want your paintings to look natural, you have to learn how to make colors less vivid.
Another way to say this is that you have to learn how to neutralize colors.
Using a color straight from the tube is one source of this problem. Grass is green, so you might be tempted to just paint it with Phthalo Green. But if you want to make a duller green, you have to add a warm color to make it a duller green. Both red and orange will work to make green duller.
Knowing which color to add to make a color less vivid can be a little tricky.
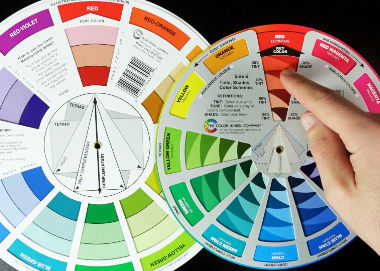
Some suggest using the color wheel. The idea is to use the color that’s opposite of it on the color wheel. While there is some truth to that, it doesn’t always work perfectly.
For one, there are different color wheels available. As I mentioned, the CMYK color while uses different primary colors than the traditional red, yellow, and blue color wheel.
So that would also mean that the colors that are opposite of each other are different too. I demonstrate this in the video about color wheels that I mentioned above.
The one way that a color wheel might help is that you can think of colors being either warm or cool. So if you want to neutralize a cool color you would use a warm color to do that and vice versa.
With some practice, you’ll get better at this and it will become more intuitive. Watching artists mix colors will help you to grasp this concept too.
In my videos, I often say that a color that I’m mixing looks too vivid and then say which color I will use to make it duller.
There are also mixing complements, which are colors that turn gray when you mix them in the right proportions. Burnt Sienna and Ultramarine Blue is probably the most common example.
In a recent portrait painting video about how to mix skin tones, I use those two colors to mix the color of her hair.
The set of colors that I bought didn’t include black so I mixed it from Burnt Sienna and Ultramarine Blue. It’s not quite as dark as lamp black or carbon black, but it worked.
Final Thoughts
Learning how to mix colors accurately is something that takes a lot of practice to get good at.
You can watch all of my videos and get an idea of how to do it, but you still have to practice. Just having some instruction will help to avoid the most common pitfalls and you won’t have to rely on trial and error as much.
Another thing that happens is that you will develop preferences for certain colors and color combinations.
Many artists will use a lot of the same colors in their paintings and that can make the color mixing easier. Once you figure out how to mix certain colors, you tend to use them repeatedly.
You will gain a little more color mixing experience with each painting that you complete.
With enough time, you will be able to mix whatever color you need in a painting without getting stuck or frustrated. You can get there if you practice enough and that’s when painting becomes more fun.


